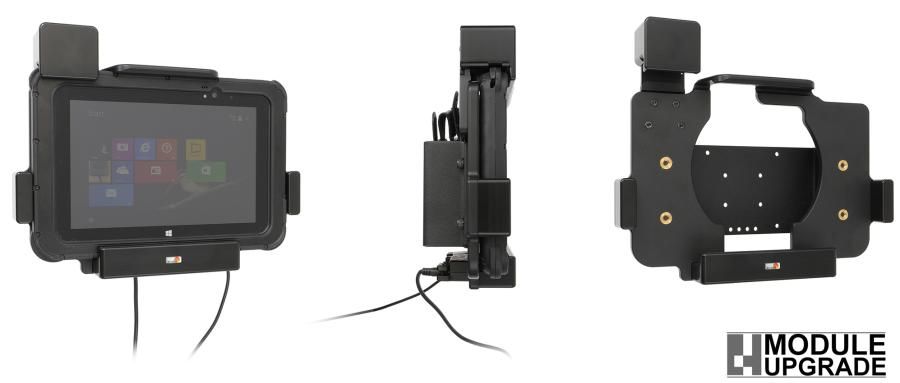
With spring stud locking. For rugged frame, with/without exp.module/handstrap. USB-A Host+DC 5,5x5,1-1,5mm (cable NOT included). Module Upgrade Cradle.
The Zebra ET5x series Module Upgrade Cradles from Brodit are designed to withstand frequent wear and tear in professional every day use, providing a more productive working day and better working environment with your device within sight and reach. Safe, efficient and convenient!
This cradle is the perfect choice when you want to have both power and USB-Host functionality, and to have it firmly in place while easy accessible. Connect a cable to the DC barrel jack port for safe and reliable charging via pogo pins to the tablet and attached accessories (cable not included, sold separately). The USB-A port provides up to 1,5A so even the most demanding extended-range barcode scanner, keyboard, sensor or other accessory can be connected directly to the tablet. The spring lock keeps the tablet from moving forward.
The USB-A port can be powered in two different ways: When the cradle is EXTERNALLY powered with 12Vdc, the USB-A port will supply 1.5A at 5Vdc. When the cradle is used WITHOUT an external 12Vdc supply, the USB-A port will supply 1.1A at 5Vdc. When using this option the accesory connected to the USB-A port will draw power from the ET5x and reduce the battery more quickly.
The cradle is customized with a perfect fit for devices in its rugged frame with 30-pin connector, with and without any expansion back module/handstrap (not for integrated scanner). It has a robust design and has been tested for vibrations for use in a normal forklift environment. You have full access to the camera,scanner, buttons and ports while docked. Easy one-hand insertion and removal.
Attach the cradle onto any flat surface or Pedestal Mount in a forklift, truck, distribution vehicle, warehouse, table top etc. Backplate made of steel with 4 mm AMPS and 4 mm VESA 75 standard holes. Made of high grade ABS-, Acetal-plastic and metal. Color: Black. Made in Sweden.
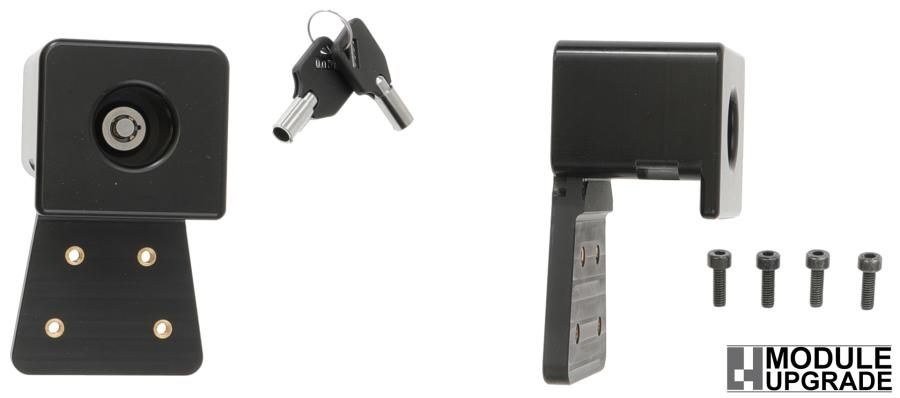
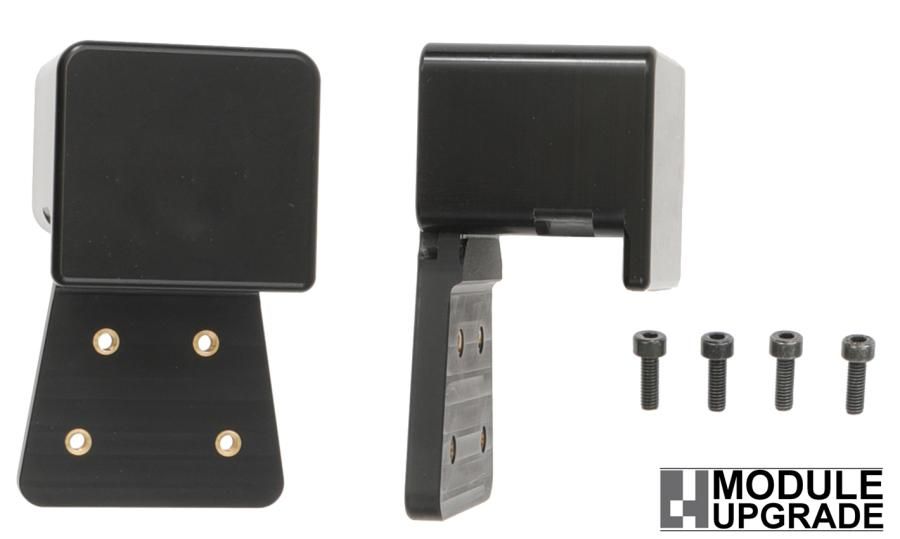
This is a Module Upgrade Cradle, this means that you can upgrade or replace features by using some of the following modules:
Item no. 216228 Spring stud lock
Item no. 216229 Key lock
Item no. 216230 Charging module
Item no. 216250 Extension plate
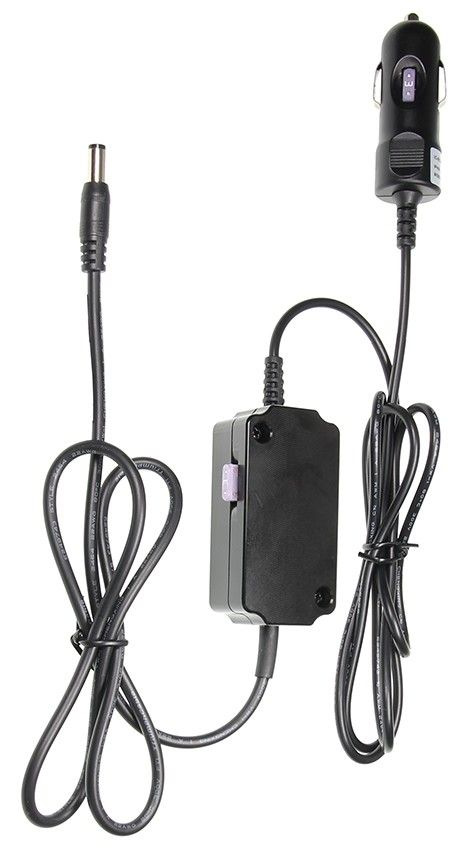
The cradle features a USB-A port for USB Host data transfer and DC barrel jack port 5,5x5,1-1,5mm for power supply via pogo pins. Cable managment options. Cable for power supply is NOT included with the cradle, add one of the followin products in order to get charging for your device:
Item no. 941022 Cable with cig-plug, straight cable.12V out, 2,5A. 12/24V in.
Item no. 941021 Cable for fixed installation. 12V out, 2,5A. 12/24V in.
Item no. 216240 Alfatronix Converter 12V out, 48V in, with 2 m cable.
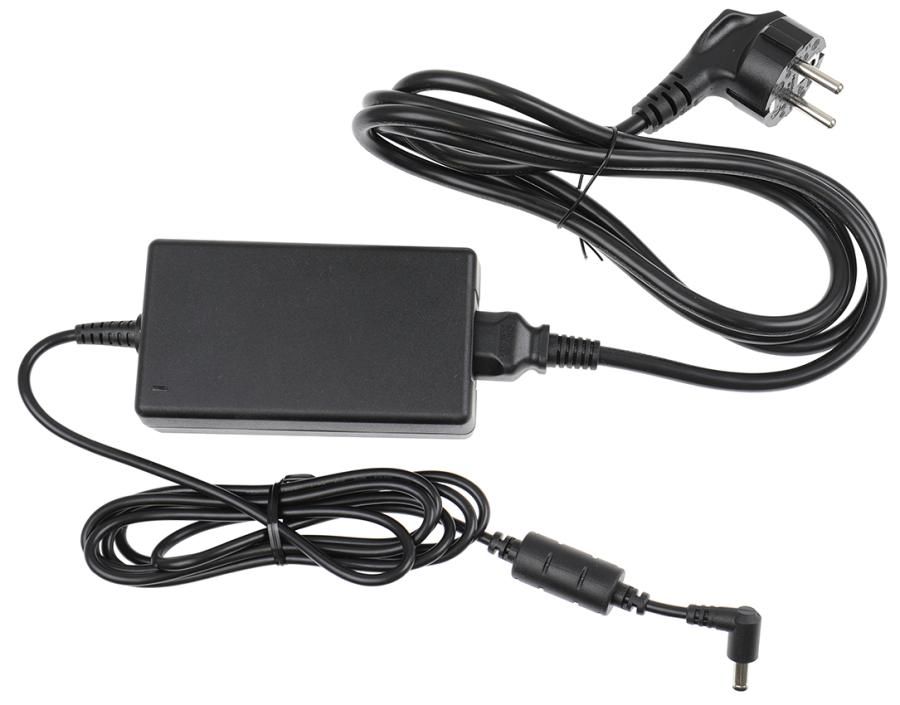
Item no. 216249 12V Power supply, with 220V connector, worldwide adapters included.
Choose installation placement with care, devices must not be placed in positions where they may block the view or important controls. The cradle should only be attached onto a suitable place. Installations always take place at the customer's own discretion and responsibility.


 PDAplus English


